

Build and test your first voice assistant in under 3 minutes
Quickstart Guide
Build and test your first conversational voice AI assistant in under 3 minutes.
In this tutorial, you will configure an assistant, give it a custom system prompt and voice persona, and place an in-browser test call via WebRTC.
Step 1: Open Assistant Studio
Navigate to the Assistant Studio to view your existing voice assistants or create a new one:
- In the left sidebar of the dashboard, expand Ecosystem and click Assistant.
- Click the Create New Assistant button in the upper-right corner.
- Select a starter template (e.g. Customer Support, Lead Qualification, Appointment Booking) or click Blank Assistant.
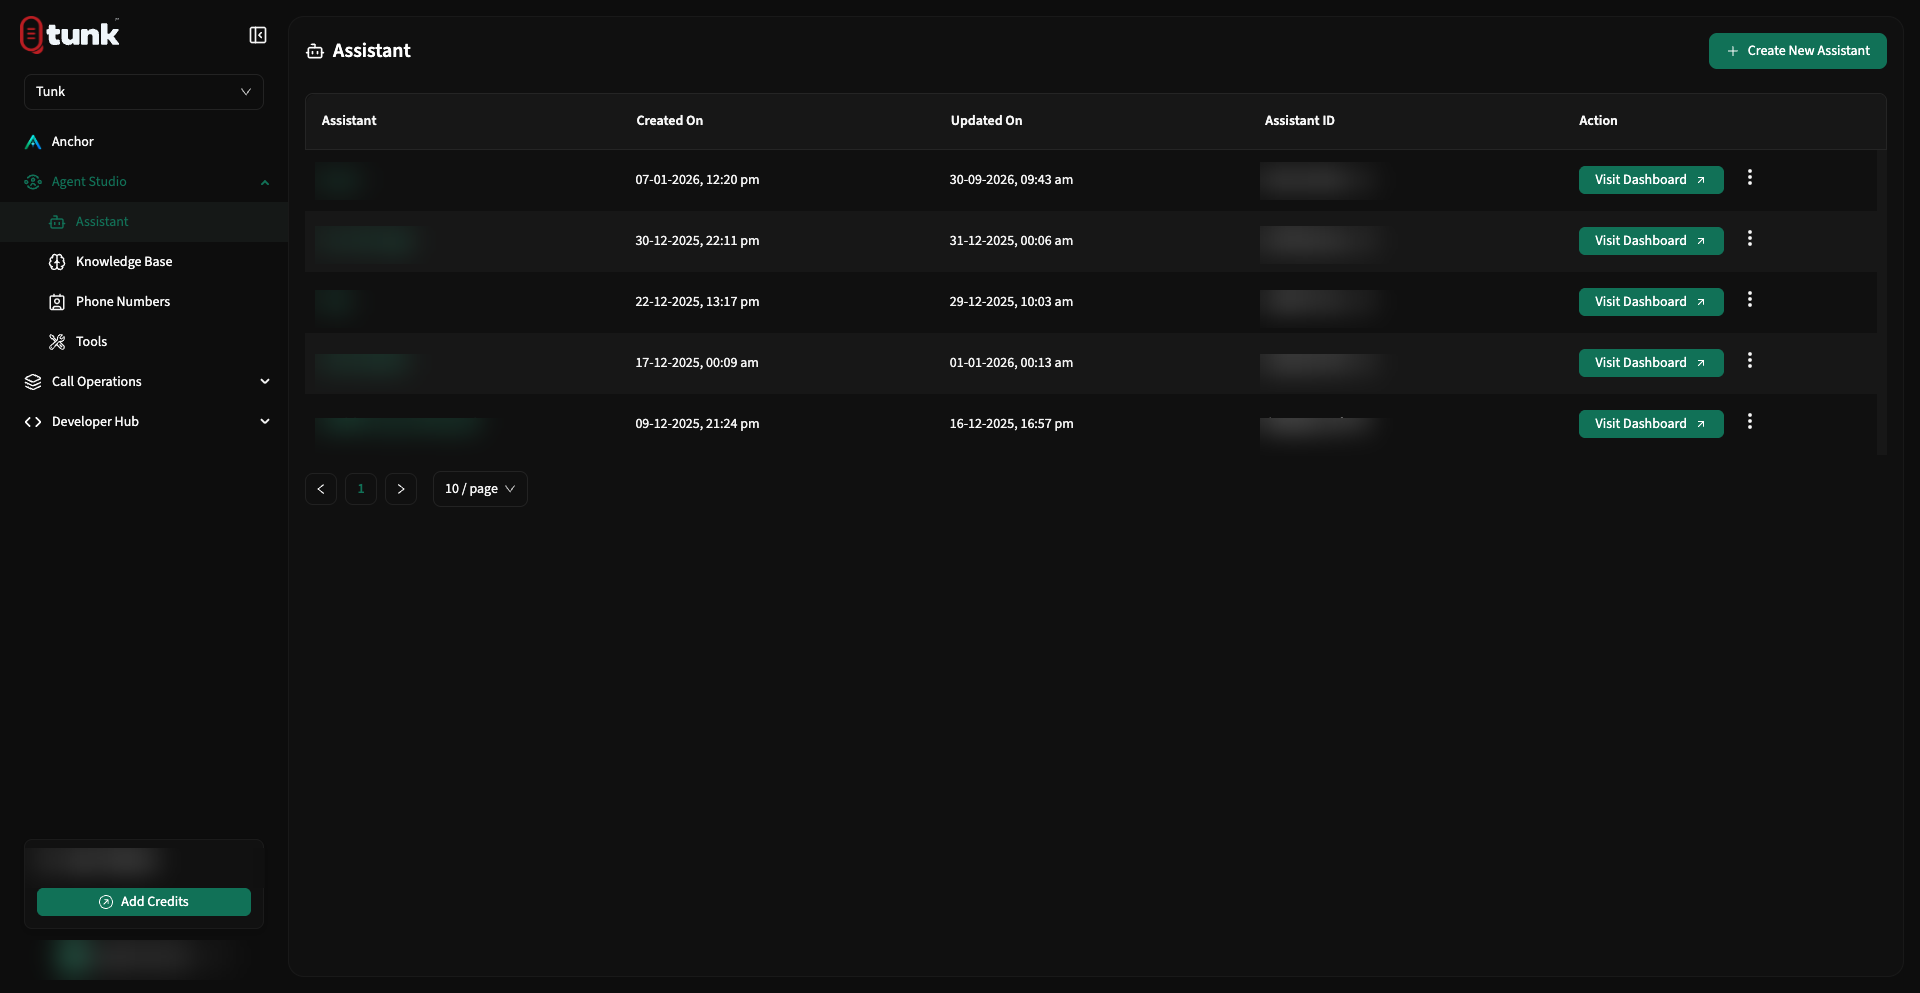 Assistant Studio Listing
Step 2: Configure System Prompt & Model
Once your assistant is created, open the Command tab:
- Opening Message: Enter the initial greeting the assistant will speak as soon as the call connects:
Plain text
Hello! Thanks for calling Acme Support. My name is Alex. How can I help you today? - System Prompt: Define the persona, conversational guardrails, and role:
Markdown
You are Alex, an expert support representative for Acme Corp. - Speak in a warm, concise, and professional tone. - Answer customer questions directly in 1-2 sentences. - If you do not know the answer, politely offer to transfer to a human specialist. - Never invent order statuses or billing details. - Provider & AI Model: Select OpenAI (
gpt-4oorgpt-4o-mini) or Google Gemini (gemini-1.5-flash). - Max Tokens: Set to
250for crisp, conversational responses without monologue delays.
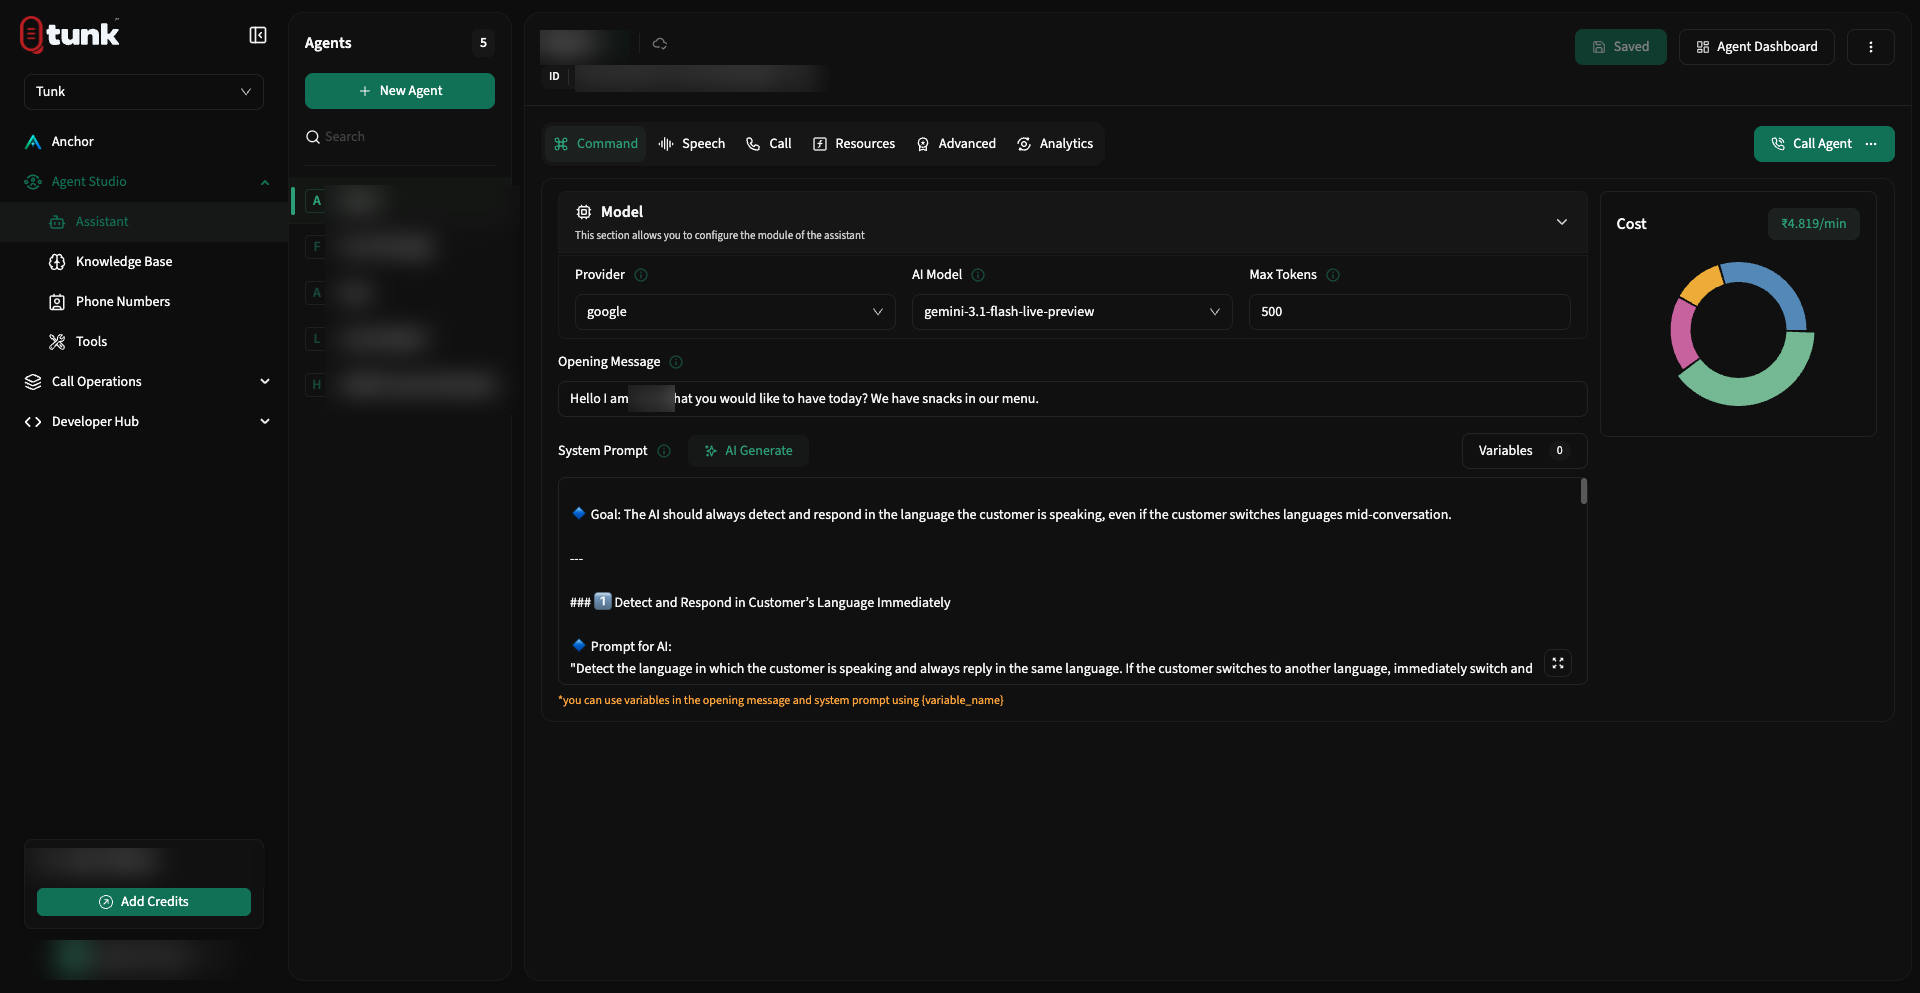 Assistant Command Configuration
Step 3: Select Voice & Speech Settings
Switch to the Speech tab to choose a voice persona:
- Synthesizer Provider: Choose ElevenLabs or Cartesia Sonic for ultra-low latency voice streaming.
- Voice: Select from high-fidelity speaker presets (e.g. Rachel, Drew, Callum).
- Transcriber (STT): Select Deepgram (
nova-3) for accurate speech recognition and background noise suppression. - Click Save Config in the top navigation bar.
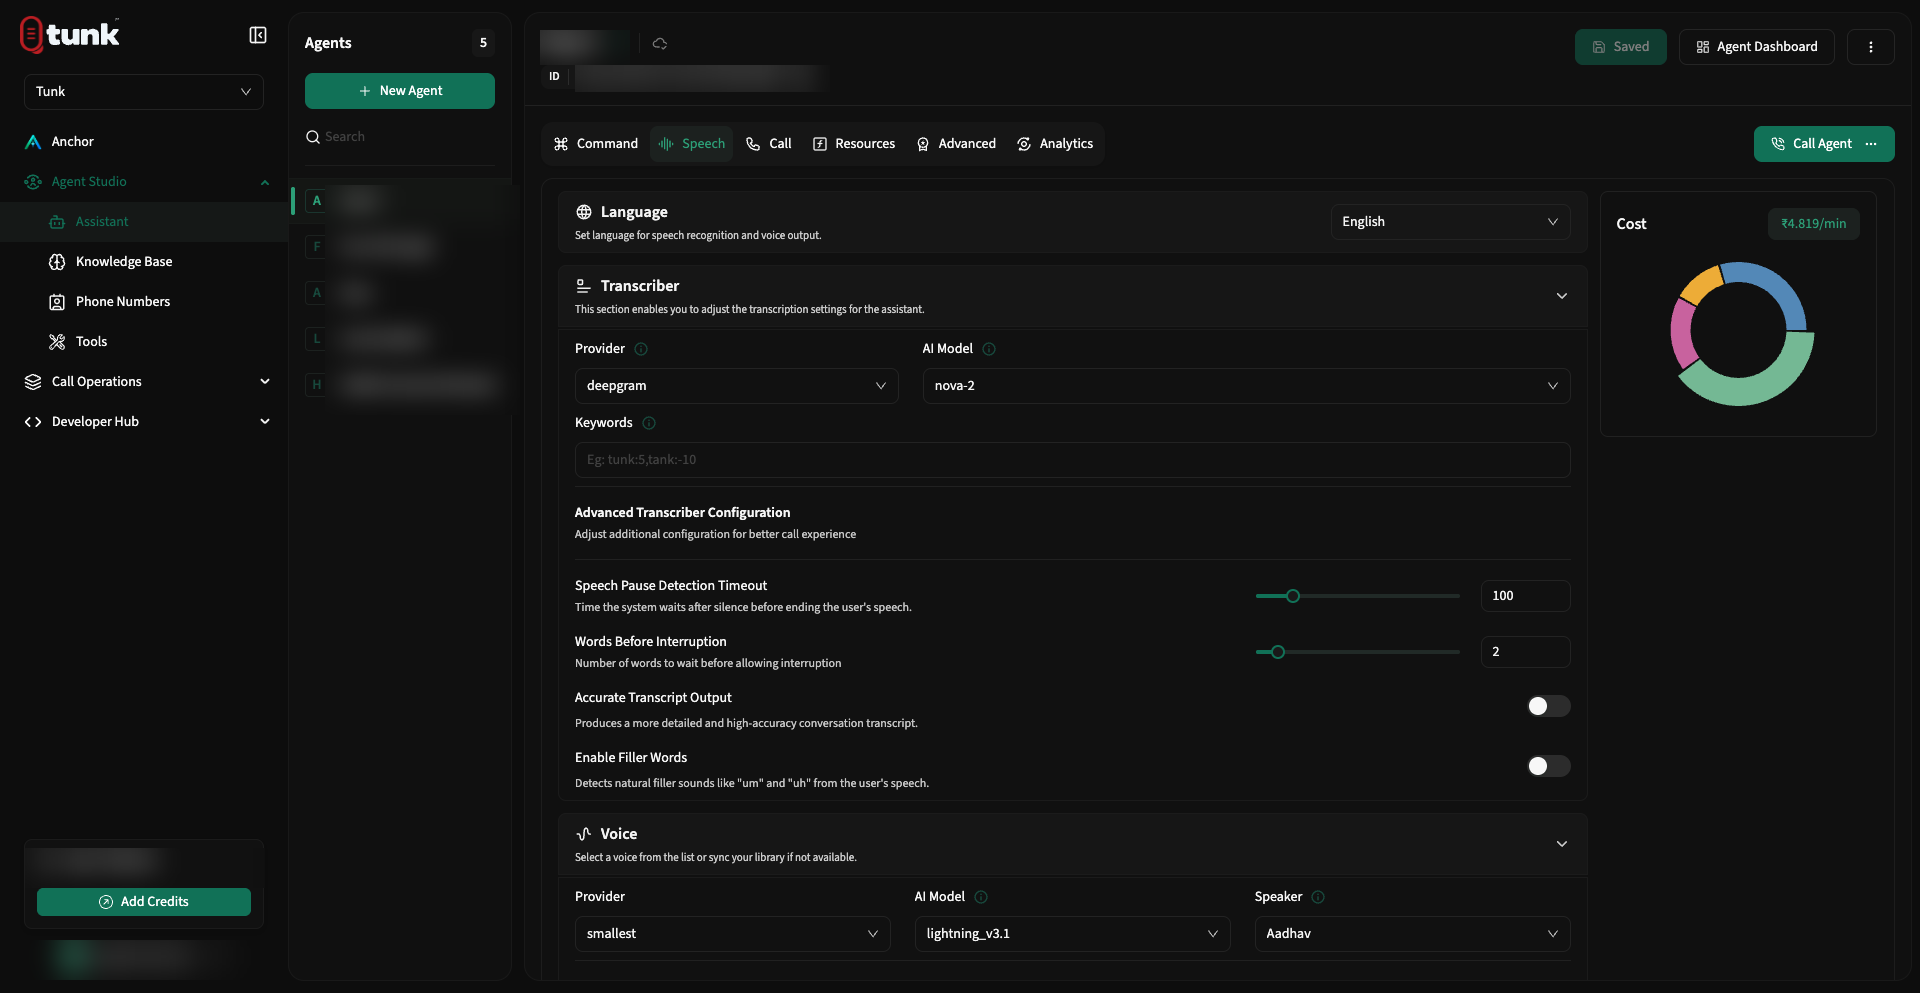 Assistant Speech Configuration
Step 4: Test Your Assistant Live
You don't need a phone number to test your assistant. You can test it immediately inside your browser:
- Click the Test Web Call button in the top action bar of the assistant configuration panel.
- Grant microphone access when prompted by your browser.
- Speak naturally to your assistant and listen to the streaming voice response.
- Watch the real-time transcript to verify latency and pronunciation.
Next Steps
Now that your assistant is running, explore these capabilities:
- Connect a Phone Number to make and receive PSTN calls via Twilio, Plivo, or Vonage.
- Add a Knowledge Base to ground your assistant in your company's PDFs and documentation.
- Add Custom REST Tools so your assistant can look up orders and trigger webhooks.
- Run an Outbound Campaign to dial a CSV list of contacts automatically.
Need help? Reach out on our support portal.